ON THIS SHEET
A Preparation
B Falls to waste
C The membrane
D Tile formats
E Grout and trims
F Tiling sequence
G Common questions
SERVICE 06 — BATHROOM TILING
Bathroom Tiling St Kilda
Tile is the face of a bathroom, but most of the work that decides how it looks happens before the first tile goes down. A flat, sound wall, a floor that drains, a set-out that suits the room and a grout joint that stays clean. We tile floors and walls in bathrooms, ensuites and showers across St Kilda, Elwood, Balaclava, Windsor and nearby suburbs.
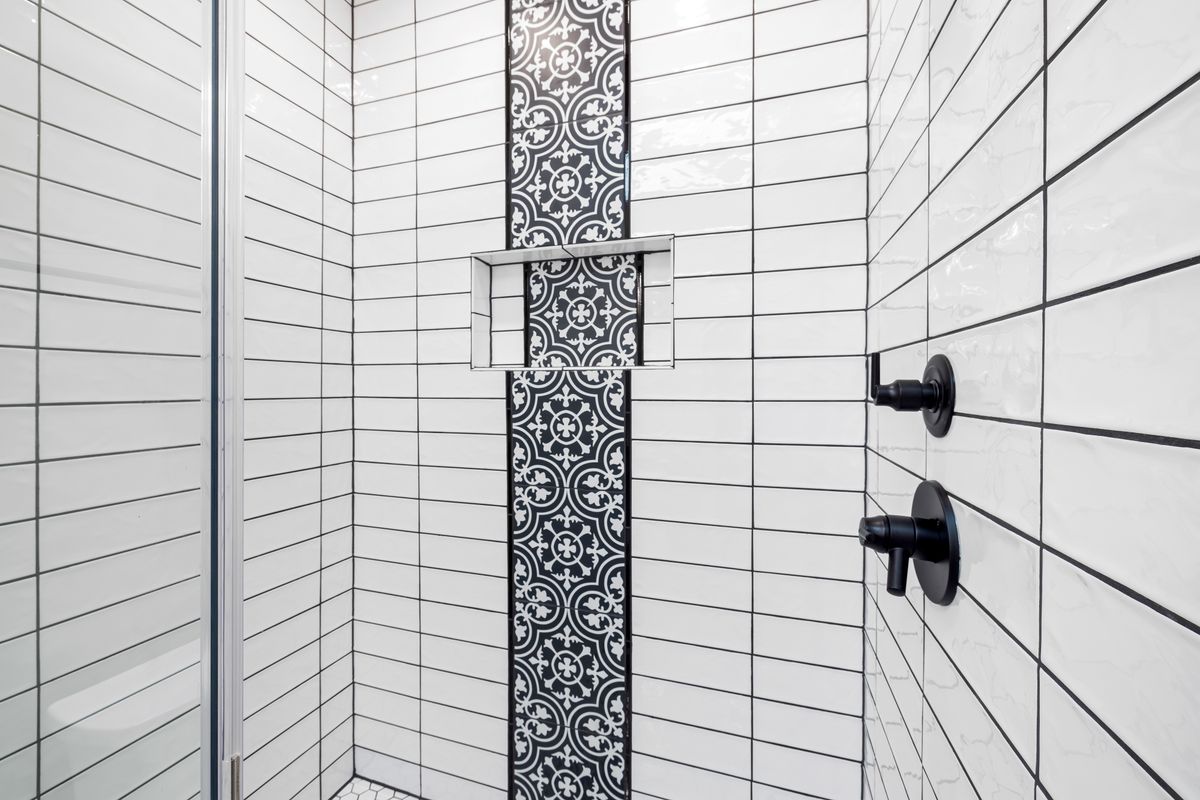
Elevation — subway tile with a contrast grout joint and a patterned vertical strip
A–C — UNDER THE TILE
What sits under the tile
A — PREPARATION
A flat, sound substrate
Older St Kilda flats often hide uneven render, drummy sheeting or layers of past tiles. We strip back to a solid base and correct out-of-plane walls, because no adhesive bed can fully hide a bowed wall under a long, straight tile.
B — FALLS TO WASTE
A floor that drains
Shower and bathroom floors are graded so water runs to the waste instead of pooling at a wall. The fall is formed in the screed, then the tile layout follows it: smaller tiles bend to a centre waste, while a linear drain lets larger tiles fall in one plane.
C — THE MEMBRANE
Waterproofing first
Tile and grout are not waterproof on their own. The membrane beneath them does that job, so it must be complete and cured before tiling starts. See how the layer is built on our Waterproofing page.
D — TILE FORMATS
Choosing a tile format for a tight room
Mosaic and small formats suit shower floors graded to a centre waste, niches and curved or stepped surfaces. More joints also mean more grip underfoot.
Subway and rectangular tiles read well on narrow walls. Laid vertically they lift a low ceiling; laid horizontally they widen a galley bathroom.
Large formats give fewer grout lines and a calmer wall, but need a very flat substrate, careful handling and a layout that avoids thin slivers at corners. They often feature in luxury bathroom renovations.
Floor tiles also need a slip rating suited to a wet area. We talk that through before you commit to a sample.
E — Grout and trims
— Grout colour: a close match hides joints; a contrast draws the pattern.
— Joint width follows the tile’s edge and format, not just the look.
— Flexible sealant, not grout, belongs at internal corners and wall-to-floor junctions.
— Trims in metal or matching profiles finish exposed edges on niches, nibs and hobless shower thresholds.
— Mitred edges are an option where a trim line would break a clean corner.
F — TILING SEQUENCE
How a tiled bathroom goes together
01
Set-out
Plan where cuts land, centre the pattern on the main view and line joints up with niches, tapware and the vanity.
02
Floor
Lay floor tiles to the formed falls, checking drainage toward the waste as each area is set.
03
Walls
Work up from a level datum so courses stay true, with niche and window returns finished as they are reached.
04
Grout and seal
Grout the joints, then apply flexible sealant to corners and junctions so the room can move without cracking.
Can you tile over my existing tiles?
Sometimes on a dry wall, but rarely in a shower. Tiling over old tile hides whatever is failing underneath and leaves no chance to renew the membrane, so wet areas are usually stripped back.
Why is my grout cracking in the corners?
Corners and wall-to-floor junctions move slightly, and rigid grout cracks there. Flexible sealant is the right material for those joints. If cracked grout comes with damp or stained walls, look at leaking shower repairs.
Can large tiles work in a small bathroom?
Often, yes. Fewer joints can make a small room feel calmer. The catch is set-out and falls, which is why we resolve them as part of bathroom design or a small bathroom renovation.
Do you supply the tiles?
Tell us whether you have tiles chosen or want help selecting them when you get in touch, and we can plan around either.
RELATED SHEETS
Planning new tiles for your bathroom?
Send a few photos of the room, straight on to each wall and one of the floor, along with any tiles you are considering.