SERVICE 08 — SHOWER RENOVATIONS
Shower renovations in St Kilda: a better shower inside the room you already have
Many St Kilda bathrooms work well enough except for the shower: a tired screen, a cracked base, a wobbly rail, nowhere to put a bottle. A shower renovation replaces that corner properly, from the membrane behind the tile to the glass at the front.

Elevation — rain head, built-in niche and open shower face (reference photo)
A — Screens
Fixed panels, hinged doors or sliding glass, chosen for how the door clears the vanity.
B — Niches
Recessed shelves set into the wall, lined up with the tile courses.
C — Tapware & rails
Mixers, rail showers and overhead heads placed where they are easy to reach.
D — Floor
A shower base or a fully tiled floor, graded to the waste.
SHEET A — PLAN
Which screen suits the room?
In a narrow bathroom the screen decides whether the room feels open or crowded. The right choice depends on door swing, where the water lands and how much glass you want to clean.
Fixed glass panel
One panel, no door. It works where the shower runs along the length of the room and the waste sits away from the opening. Fewer seals and hinges also means less to maintain. It pairs naturally with walk-in showers.
Hinged door
Frameless or semi-frameless, a hinged door keeps water in a compact corner shower. The door needs clear space to open outward, so we check it against the vanity, toilet and entry door before anything is ordered.
Sliding screen
Useful when there is no room for a door to swing, such as a recess between two walls. Tracks and rollers need more cleaning, but a sliding screen can rescue a tight layout.
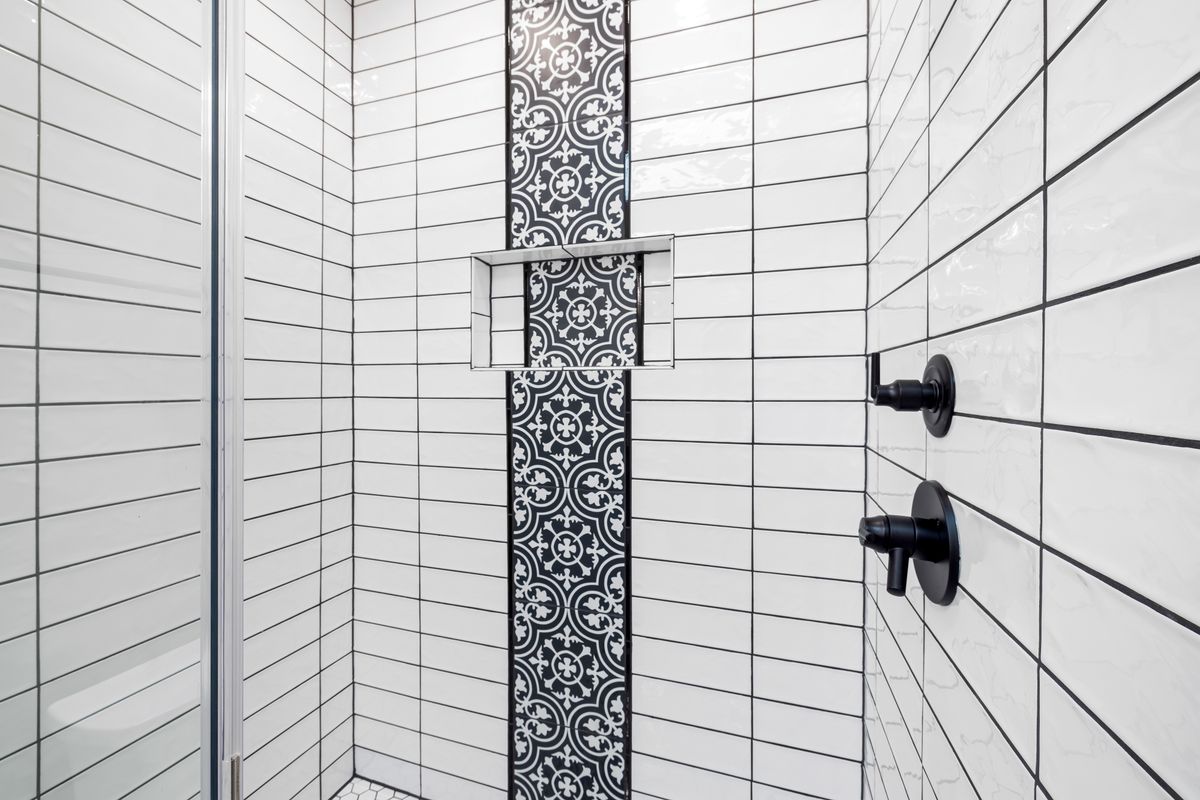
Section — a recessed niche set within subway tile courses (reference photo)
SHEET B — SECTION
What goes into the shower wall
Recessed niches
A niche replaces the corner caddy with a shelf built into the wall frame. It looks best when its top and bottom edges fall on a full tile line, and it needs waterproofing folded into every internal corner. Placing it on a side wall keeps it clear of the direct spray.
Tapware and rail showers
A rail shower lets you adjust the handpiece height, which is useful for households of different heights and for rinsing the shower down. An overhead rain head feels generous, but it needs the right ceiling height and water flow. Set the mixer near the entry, so you can turn the water on without standing under it.
Shower base or tiled floor?
A preformed base is quick to install and has a built-in fall, but it limits the shower to standard sizes. A tiled floor, laid over a membrane and graded to a strip or square waste, can fit any shape and can continue the bathroom floor tile. See bathroom tiling and waterproofing for how each layer is built.
SHEET C — ELEVATION
How a shower renovation comes together
01 Look at the existing shower
Check the layout, plumbing and any signs of past leaks before choosing the scope.
02 Settle screen, niche, tapware and floor
Make each decision on paper so the tile setout and plumbing points agree.
03 Strip out and rough in
Remove old tiles and base, frame the niche and set mixer and rail positions.
04 Waterproof, then tile
Apply the membrane and let it cure, then lay the floor fall and wall courses.
05 Fit off and install glass
Fit the tapware, measure for the screen against the finished tile, then install it.
Can the shower be renovated without redoing the whole bathroom?
Often, yes. The work covers the shower area, but matching tiles or the floor waterproofing may extend the scope. We’ll talk that through before work starts. For a full refit, see complete bathroom renovations.
My shower leaks. Is that a repair or a renovation?
It depends on the cause. Failed grout or silicone can sometimes be repaired, while a failed membrane usually means lifting the tiles. Start with leaking shower repairs.
Can a shower over bath become a walk-in shower?
In many narrow bathrooms that’s the most useful change. It depends on the waste position and floor structure. Read the walk-in shower guide.
RELATED SHEETS
Planning a shower in St Kilda, St Kilda East, St Kilda West, Elwood, Balaclava, Windsor, Prahran, Albert Park or Middle Park? Describe the room in your message, and have these photos ready if we ask for them: the existing shower taken straight on, plus one of the floor waste.
Have a question first? Contact us.