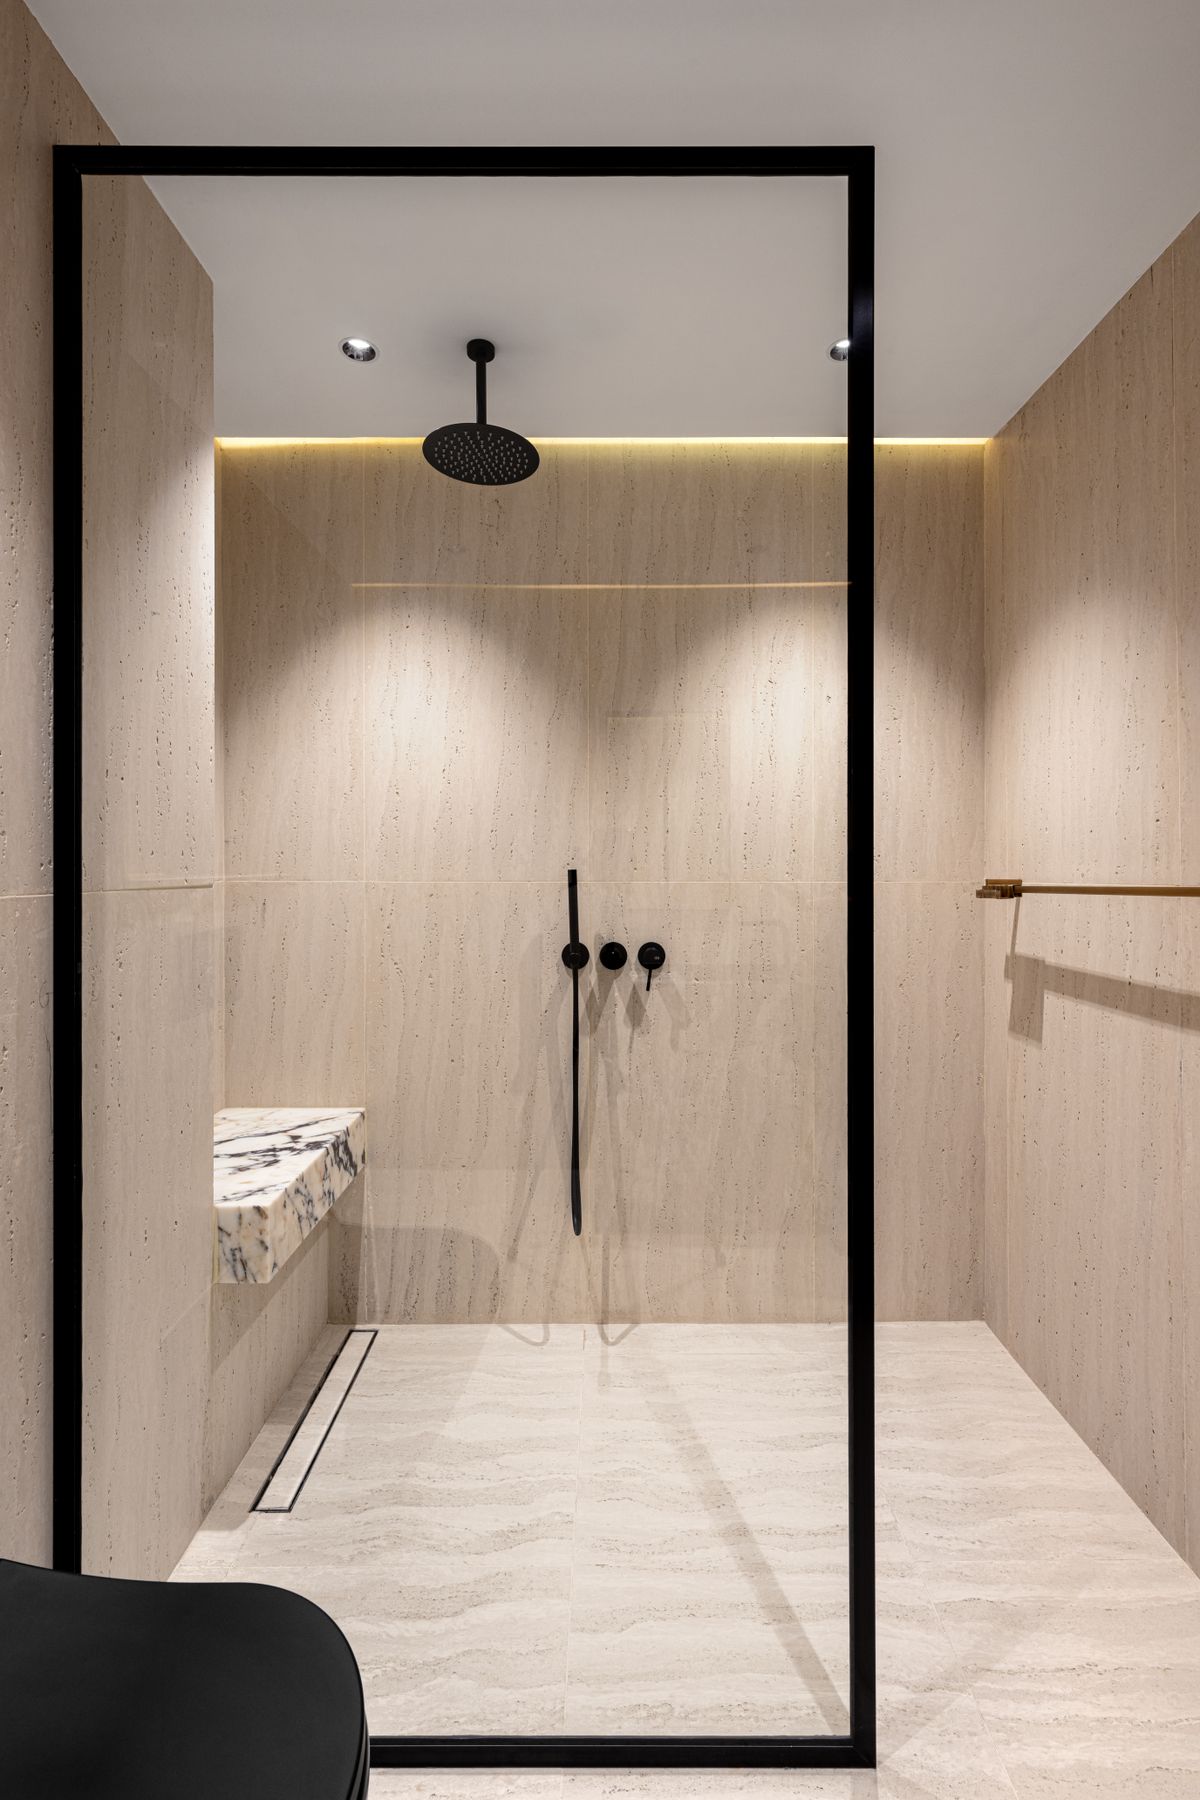
Reference: a stone-look walk-in shower with a built-in bench
A walk-in shower drops the door, the hob and often the tray. What’s left is an open wet zone that makes a small room look bigger. It only works when the plan, the glass and the floor are all designed together. In St Kilda flats and terraces, the room is usually narrow, so each of those choices has less room for error.
ON THIS SHEET
A · PLAN Space and splash
B · ELEVATION Glass panels
C · SECTION Drains and floor falls
D · USE Access and narrow rooms
SHEET A — PLAN
Where does the water land?
Start with the showerhead, not the glass. Water spreads out from the rose and bounces off the body and the walls, so the dry side of the room depends on where the outlet sits and which way it points. A rain head placed well back from the open end keeps most of the spray inside the zone. A handheld on a rail aimed at the entry does the opposite.
On paper, draw the wet zone first. Then check what sits in the splash path: the toilet roll holder, a timber vanity edge, the door swing, a power point. Anything that can’t get wet moves, or the glass grows to protect it. If you can’t fit a sensible open walk-in, a screened shower over the bath may suit the room better. Our bathroom layouts guide compares both.
SHEET B — ELEVATION
One fixed panel, chosen carefully
Most walk-in showers use a single fixed panel of frameless glass. It is anchored to the wall and floor, and often braced with a slim bar to the ceiling or the side wall. Three choices shape the finished elevation:
— Panel length: a longer panel gives more splash protection but reads as more enclosed.
— Return panel: a short hinged or fixed return at the open end helps where the entry faces the vanity.
— Finish: clear glass keeps a narrow room open, and fluted or frosted glass adds privacy in a shared bathroom.
Screens and fittings vary in size and detail, so treat these as starting points to confirm on site. They are not fixed rules.

Reference: a single fixed glass screen keeps an open walk-in shower in its own zone
SHEET C — SECTION
The floor does the work
With no hob to hold water back, the floor has to slope it all towards the waste. The falls, the drain and the membrane underneath are planned as one detail before any tile is chosen.
01
Linear or centre drain
A linear strip drain along a wall or the open end lets the floor fall in one direction. That suits large-format tiles and a flush entry. A centre waste needs the floor to fall from all four sides, which usually means smaller tiles or careful cuts.
02
Floor falls
The slope has to be steep enough to drain but gentle enough to stand on. It is built into the screed under the tiles, so it’s set early and hard to fix later.
03
Membrane past the glass
In an open shower, water travels further than the screen line. Wet-area membranes and flashings need to extend to suit and meet current Australian Standards. See the waterproofing guide for the layer order, or Bathroom Waterproofing St Kilda for the service.
Water marks outside an existing walk-in? That’s often a falls or membrane issue. Leaking Shower Repairs starts there.
SHEET D — USE
Access, and fitting one into a narrow room
Is a walk-in shower good for ageing in place?
It can be. A step-free entry, a slip-resistant floor tile and solid framing behind the wall for future grab rails make the shower easier to use for longer. A handheld on a rail and a recessed niche at a comfortable height help too. Plan the wall framing now, even if rails come later.
Does it work in a galley-shaped bathroom?
Often it works best there. Putting the shower across the far end, with a single panel and a linear drain, leaves a clear run from the door past the vanity. Keeping the same floor tile through both zones makes the room read as one long space rather than two cramped ones. Our Small Bathroom Renovations page covers more of these tight plans.
What if the existing floor can't be lowered?
In upstairs flats, the slab or joists may limit how much fall the floor can take. A very slim step, a raised bathroom floor or a low-profile tray might be the practical answer. This is worth checking on site before the design is locked in.
FROM PAPER TO SITE
Take the plan further
See Walk-In Showers St Kilda for a new build, or Shower Renovations St Kilda to rework an existing shower. Would you rather talk it through? Send a note through our contact page.